Unit testing
More often than we think, we, as developers tend to believe that our code is bugless. It's all right, we wrote it, we tested two or three cases and it never failed, no exceptions, so it is ready be pushed to production. But what happens when someone asks us "did you test the code?", we can't say yes without getting nervous.
It happens, I've done it and I'm not proud of it. Trying to amend my mistakes I'll try to explain what is and present a way to perform testing using Visual Studio.
There are 4 kinds of testing:
Acceptance testing
The purpose of this test is to evaluate the system’s compliance with the business requirements and assess whether it is acceptable for delivery.
System testing
The purpose of this test is to evaluate the system’s compliance with the specified requirements.
Integration testing
The purpose of this level of testing is to expose faults in the interaction between integrated units. I've left this at the end on purpose:
Unit testing
Is a level of the software testing process where individual components of a software are tested. The purpose is to validate that each unit of the software performs as designed. It can be done by the same developer that created that unit of software, another team or even an external entity.
To perform testing on a unit of software we must have two things: A set of input values and the expected outputs for that set of values. The structure for a test is the following:

Arrange: Here is where we declare the input values for the component we are testing and the expected output
Act: In this section we execute the unit we are testing, and store the ouputs to compare them later
Assert: By this point we must compare our exepected output against the actual output of the unit we tested, note that we are not returning a value, we're just asserting something.
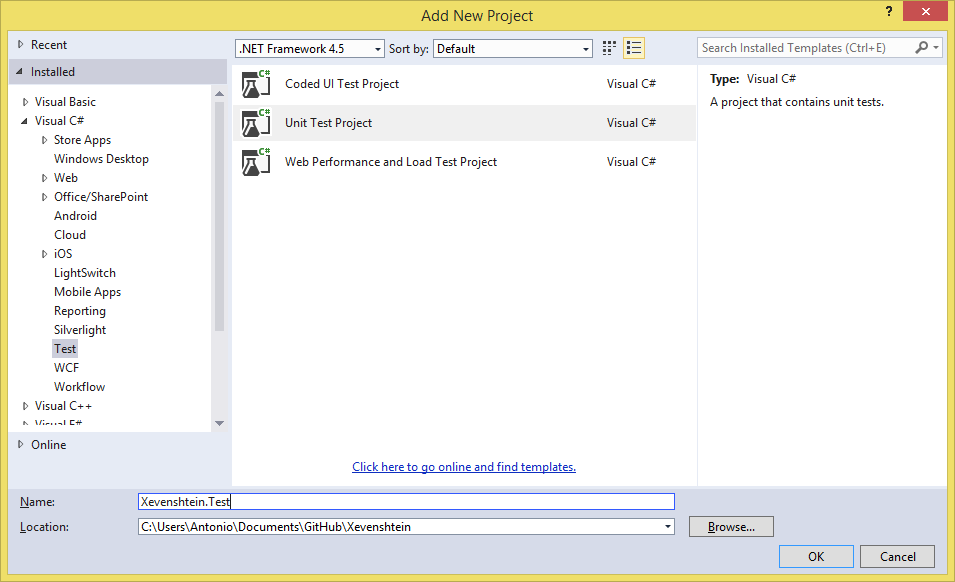
It is easy to perform unit testing using Visual Sudio. Start by adding a new Project to your solution. When the window shows up, search for Unit Test Project in the installed templates:
After the project is created it'll contain a default class.
Open it and observe that both the class and it's method are decorated with TestClass and TestMethod respectively. These decorators allow our tests to be discovered by Visual Studio's Text Explorer (to open the Text Explorer go to Test > Windows > Test Explorer).
Remember, the Unit Test Project is still a Project, so we need to add any references to other projects within our solution to test them.
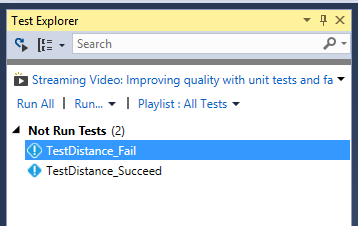
After that, rename the default class and write your own tests following the structure shown above: Arrange, Act and Assert. To allow Test Explorer to show our tests we need to build the solution we are working with, after that you'll have somewhat like this:
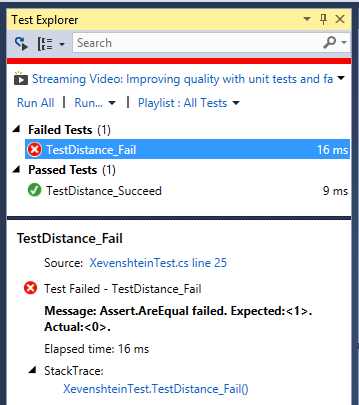
From this window we can select several actions, like run all tests, just one or all those which have failed. I've selected Run All, and this is what I've got:
Pretty cool, isn't it? Now you should go ahead and unit test your projects whenever possible. If you want to see the code I used for this post check it out on GitHub or download it here.
In the future we'll see how to create and run tests in a mobile device using NUnit Lite, or how to use Xamarin.UITesting.