Xamarin.Forms 2 and UWP
You have heard me talk about Xamarin.Forms before and you know that I'm all mobile... but what you might have missed is the fact that I'm a HUGE Windows Platform fan. This is why this new release of Xamarin has got me excited. In this release they included support for Universal Windows Platform Apps which, even though is still a preview version, it is a great tool for us as developers to start bringing our apps to even more devices.
For this post I'll be using a very simple app that I created in the past when I wrote about going from console to mobile, however, this time is all about "from mobile to Windows Platform".
How to...
We'll be following the official documentation, so fasten your seatbelt and get ready to learn how is Xamarin.Forms wired and called within a platform specific project.
Infrastructure
Feel free to download the initial source code from here, extract it somewhere and open the Xevenshtein.sln file. Once the solution is open, upgrade all Xamarin.Forms packages to any version 2 (Xamarin.Forms 2.0 is part of Xamarin 4 release).

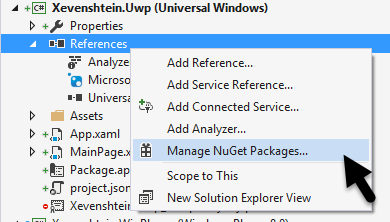
Then add a new project, this will be our UWP app and add the Xamarin.Forms NuGet package to it


Add a reference to the project where the forms application is, for us, such project is named Xevenshtein and is a PCL

Code
It is time to get our hands into the code: Open the App.xaml.cs file that was created with the UWP app, look for this handler assignation rootFrame.NavigationFailed += OnNavigationFailed;. Below this line we must initialize the Xamarin.Forms module (every platform specific project that uses Xamarin.Forms has to do this as one of the first things in the app lifecycle), to do so, simply call the Init method:
rootFrame = new Frame();

rootFrame.NavigationFailed += OnNavigationFailed;

Xamarin.Forms.Forms.Init(e); // Added support for Forms
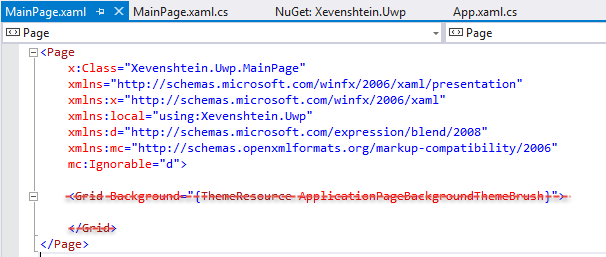
Then, we must get rid of the default UI inside the `MainPage.xaml`, we won't be using it since Forms has got us covered. Delete all code (it might be just a grid) within the `

Then, we need to change our page type to a special kind of Xamarin.Forms page. First add this "attribute" inside the <Page> tag:
xmlns:forms="using:Xamarin.Forms.Platform.UWP"
I double-quoted attribute since the line above isn't exactly an attribute, it is a namespace, somewhat like an using directive but for xaml. Once we have added the namespace, replace the page <Page and </Page> for <forms:WindowsPage and </forms:WindowsPage>, as you can see we're using the forms namespace.

And that's it for the XAML part, press `F7` to jump to the code-behind.
First things first, since our MainPage isn't a Page but a WindowsPage, replace the inheritance : Page for : WindowsPage
public sealed partial class MainPage : WindowsPage // bye, bye ": Page"
Even though replacing the inheritance in this page isn't needed (because the other partial definition of the class has it), I always do it, it gives me clarity of what type the page is.
Next... the big step: load your Forms page, this is done inside the `MainPage` constructor and after the elements of the page have been initialized:
this.InitializeComponent();

LoadApplication(new Xevenshtein.App()); // Call to Xamarin.Forms
And that's it, now you have a nice UWP app in a few steps.
What's next?
For you: keep playing around with the Xevenshtein app (the code is on GitHub), or go ahead and create an UWP version your Forms apps: just imagine one of your apps running on an Xbox One or a giant Surface Hub... but remember that this isn't the final release so if you find a bug, be a good Xamarin citizen and report it here. Oh, and don't forget to take a look to other Xamarin 4 features, like xaml compilation or the general availability of Xamarin Insights.
For me: I'll be using UWP to create a simple markdown viewer, I'll post about it later on.